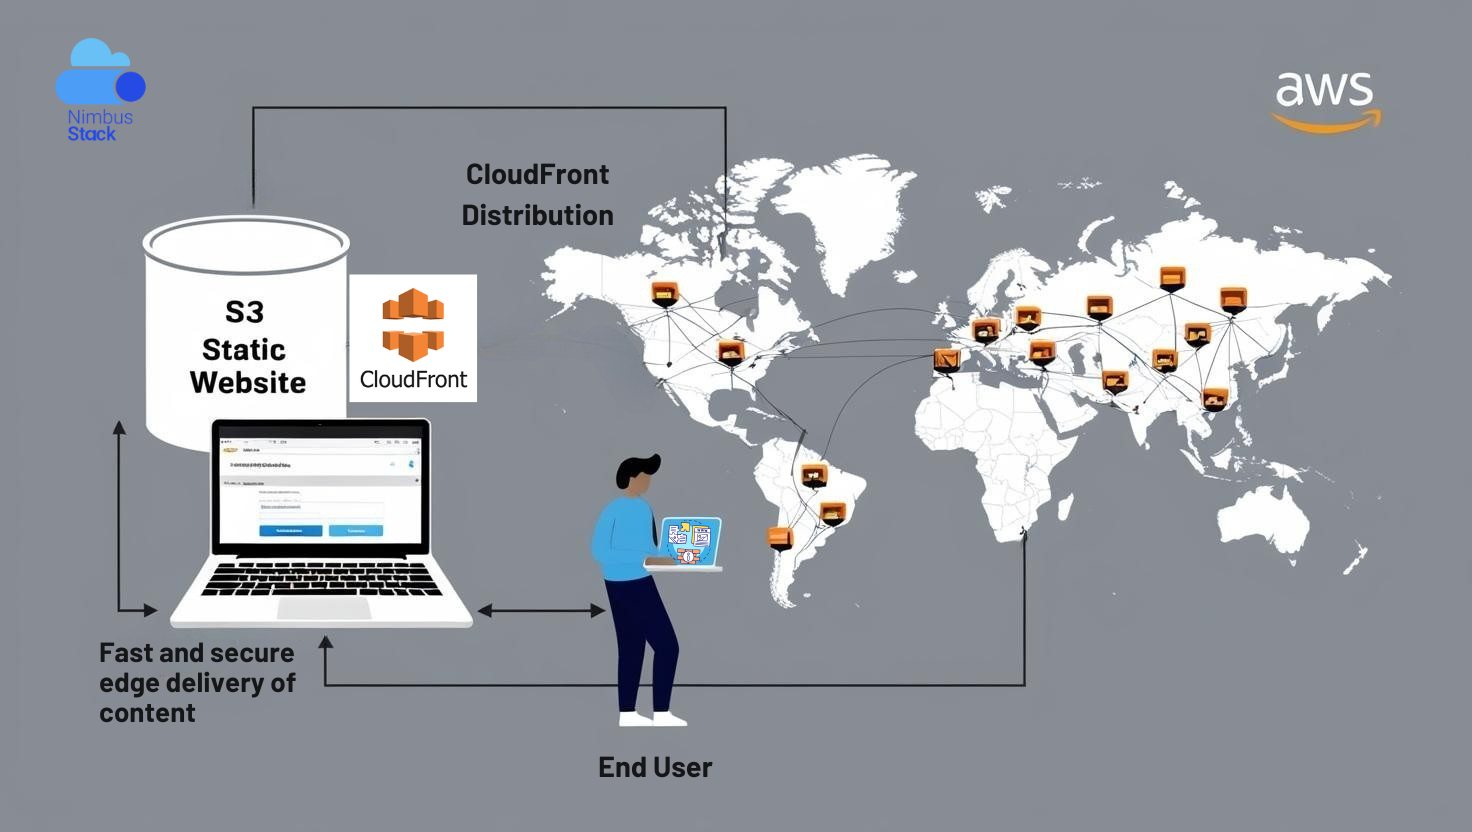
Hosting a static website on Amazon S3 (Simple Storage Service) combined with Amazon CloudFront (a Content Delivery Network or CDN) is a popular choice for achieving high availability, scalability, and low-latency content delivery. By leveraging these AWS services, you can ensure your website is fast and reliable, regardless of where your users are located.
This guide will walk you through the process of hosting an S3 static website and configuring CloudFront to optimize performance and security.
Why Use S3 and CloudFront for Website Hosting?
Amazon S3 Benefits:
- Cost-effective: Only pay for the storage and bandwidth you use.
- Scalable: Handles high traffic without additional configuration.
- Durable: Provides 99.999999999% durability for your data.
Amazon CloudFront Benefits:
- Global Performance: Delivers content via a worldwide network of edge locations.
- Caching: Reduces load times by caching content closer to users.
- Security: Provides SSL/TLS encryption, DDoS protection (via AWS Shield), and fine-grained access control.
Step-by-Step Guide
1. Create an S3 Bucket for Your Website
- Log in to the AWS Management Console.
- Navigate to the S3 service and click Create Bucket.
- Name your bucket (e.g.,
my-static-website) and select a region. - Uncheck “Block All Public Access” and confirm to allow public access (temporary for testing).
- Configure the bucket as a static website:
- Go to the bucket’s Properties tab.
- Under Static website hosting, enable it.
- Specify the index document (e.g.,
index.html) and an optional error document (e.g.,error.html).
- Upload your website files (HTML, CSS, JavaScript, etc.) into the bucket.
2. Set Up Permissions
- Open the Permissions tab of your S3 bucket.
Use a bucket policy to allow public read access:{
"Version": "2012-10-17",
"Statement": [
{
"Effect": "Allow",
"Principal": "*",
"Action": "s3:GetObject",
"Resource": "arn:aws:s3:::my-static-website/*"
}
]
}
- Replace
my-static-websitewith your bucket’s name. - Test your website by accessing the bucket’s endpoint (e.g., http://my-static-website.s3-website-us-east-1.amazonaws.com).
3. Set Up CloudFront
- Navigate to the CloudFront service in the AWS Management Console.
- Click Create Distribution.
- Choose the Web distribution option.
- Configure the origin:
- Origin domain: Enter your S3 bucket endpoint.
- Origin access: Select Origin Access Control (OAC) to secure your S3 bucket.
- Viewer protocol policy: Choose Redirect HTTP to HTTPS to ensure secure connections.
- Configure caching and performance:
- Set a default TTL (e.g., 24 hours) for static content.
- Enable compression for faster delivery.
- Customize security settings:
- Enable Custom SSL Certificate if you have a custom domain.
- Use WAF (Web Application Firewall) for additional protection.
- Complete the setup and deploy the CloudFront distribution. Note the distribution’s domain name (e.g.,
d1234abcd.cloudfront.net).
4. (Optional) Add a Custom Domain and SSL
- Register a domain with a registrar like Route 53.
- Create a DNS record (CNAME or A record) pointing your domain to the CloudFront distribution domain.
- Request or import an SSL certificate via AWS Certificate Manager (ACM) and attach it to your CloudFront distribution.
5. Test Your Setup
- Verify the website works via both the CloudFront domain and your custom domain.
- Test page load times and caching behavior by clearing your browser cache and accessing your site from different regions.
Key Considerations
- Cost Management: Monitor costs via AWS Cost Explorer, especially for data transfer and requests.
- Security: Use OAC(Origin Access Control) to restrict direct access to the S3 bucket.
- Performance Tuning: Leverage CloudFront’s caching policies to reduce origin requests.
Call to Action
Ready to host your next project with AWS? NimbusStack offers expert cloud migration and DevOps services to help you optimize your infrastructure. Contact us and avail a free cloud assessment offer today to transform your digital presence!